
So you’re upgrading your test management system, and you need to migrate from TestRail to TestGear. We’ll run you through the steps (with screenshots) for a seamless transition in this detailed guide.
Ask any team about their worries in switching platforms or tools, and migration will always make it to the top. Afterall, what you’re looking for is a migration of all your data with no down time. In software development (SDLC) that means you can resume your testing and development uninterrupted, and make sure you can release and deploy updates with no unnecessary delays.
We’re here to take the friction out of moving your test cases, and to make sure your switch from TestRail to TestGear is straightforward.
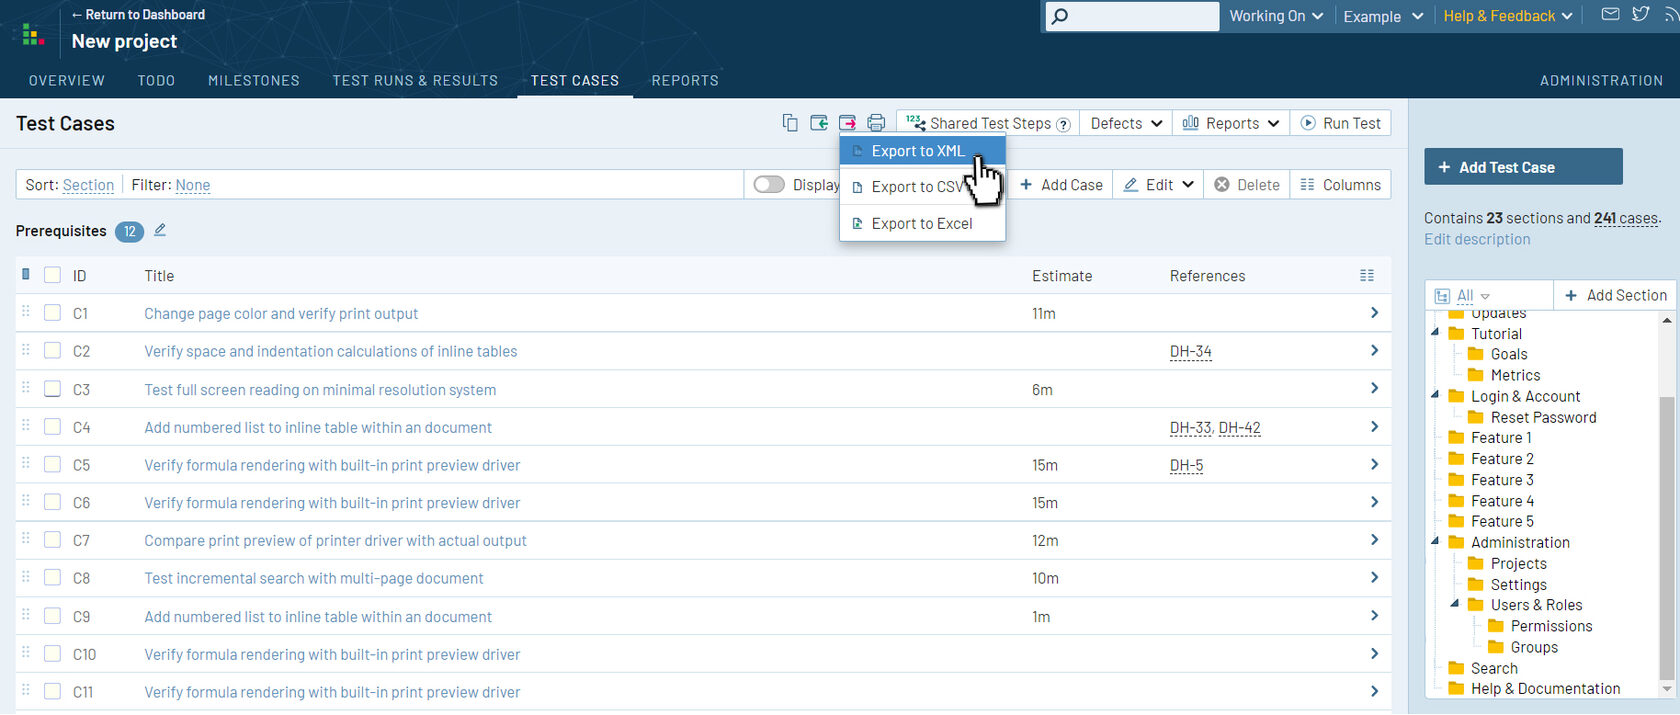
This can be done in 2 ways:
•In XML format (with attachments);
•In XLSX format (text data only).
Download your project in XML format:
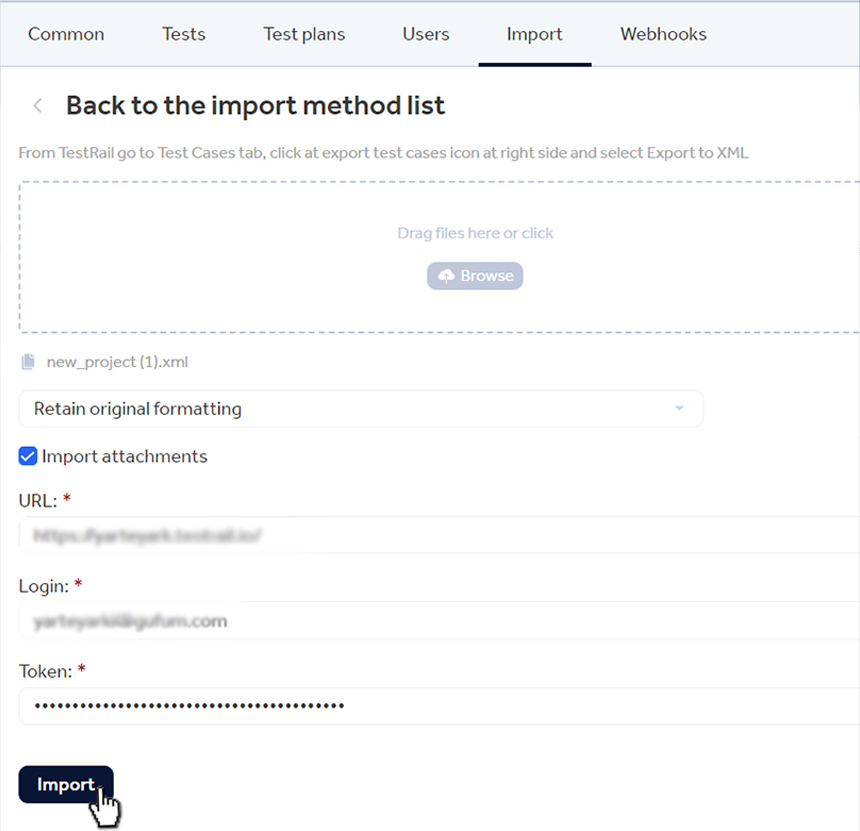
In TestGear, navigate to the project into which you want to import or create a new one. Go to the relevant project settings in the Import tab and select XML import. Upload your file and, if you want to transfer attachments, check the Import attachments box.

Make sure that the API has been enabled in the TR settings.
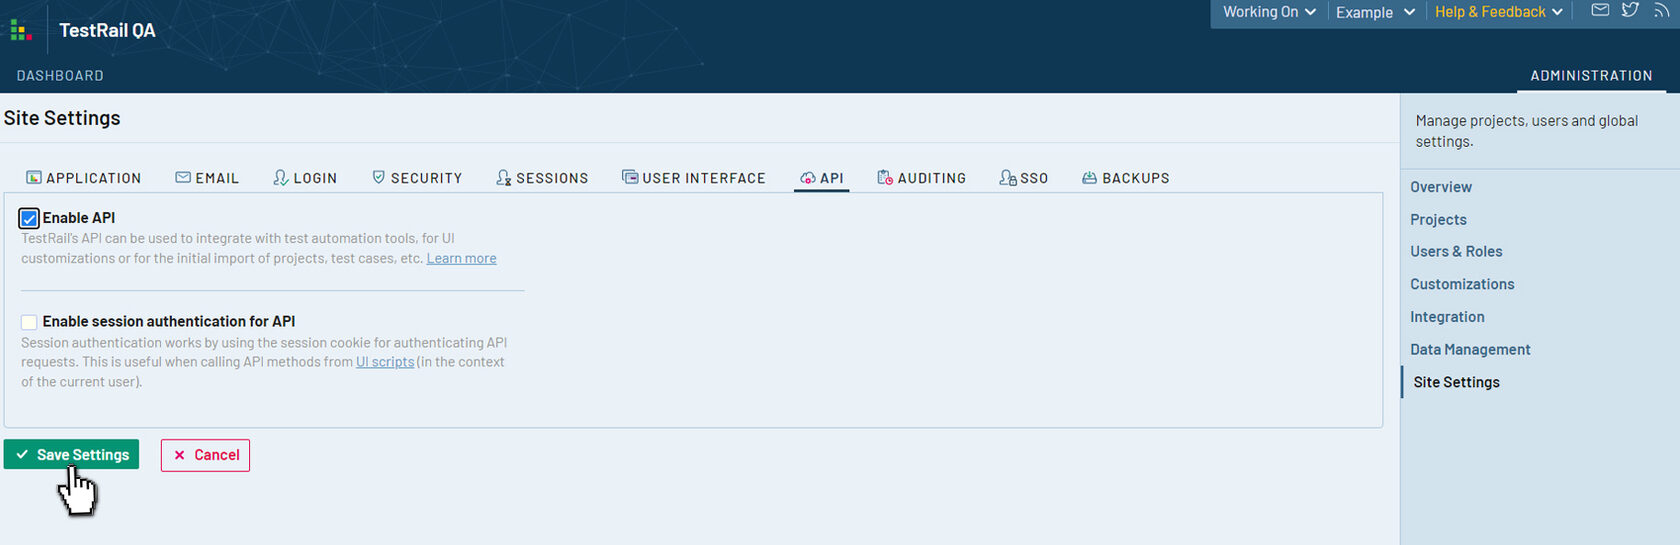
Generate an API key (token) in the TR project settings and save it separately, and save the settings in the system:

Then go into TestGear and enter the URL of the TestRail instance, your login and the token that was generated. Click the Import button.
All done! The project, together with tests and attachments, has been transferred to TestGear.
Select export project with tests from TestRail in CSV format, choose the required columns for export and download the file. When exporting, make sure that you have checked the box to include separated steps on separate rows.

Select the required settings in Microsoft Excel. To do this, open the downloaded file in Microsoft Excel, go to the Data tab in a new workbook, click Get Data and select the CSV file you created. Make sure that the file data source was marked as Unicode (UTF-8), and that a comma is used as the line separator.

Check that the transferred data is correct and save in XLSX format:

Create a new project in TestGear or go to the Import tab in the settings of an existing project and select XLSX import. Upload the prepared file. Next, correlate the fields and prioritize them:
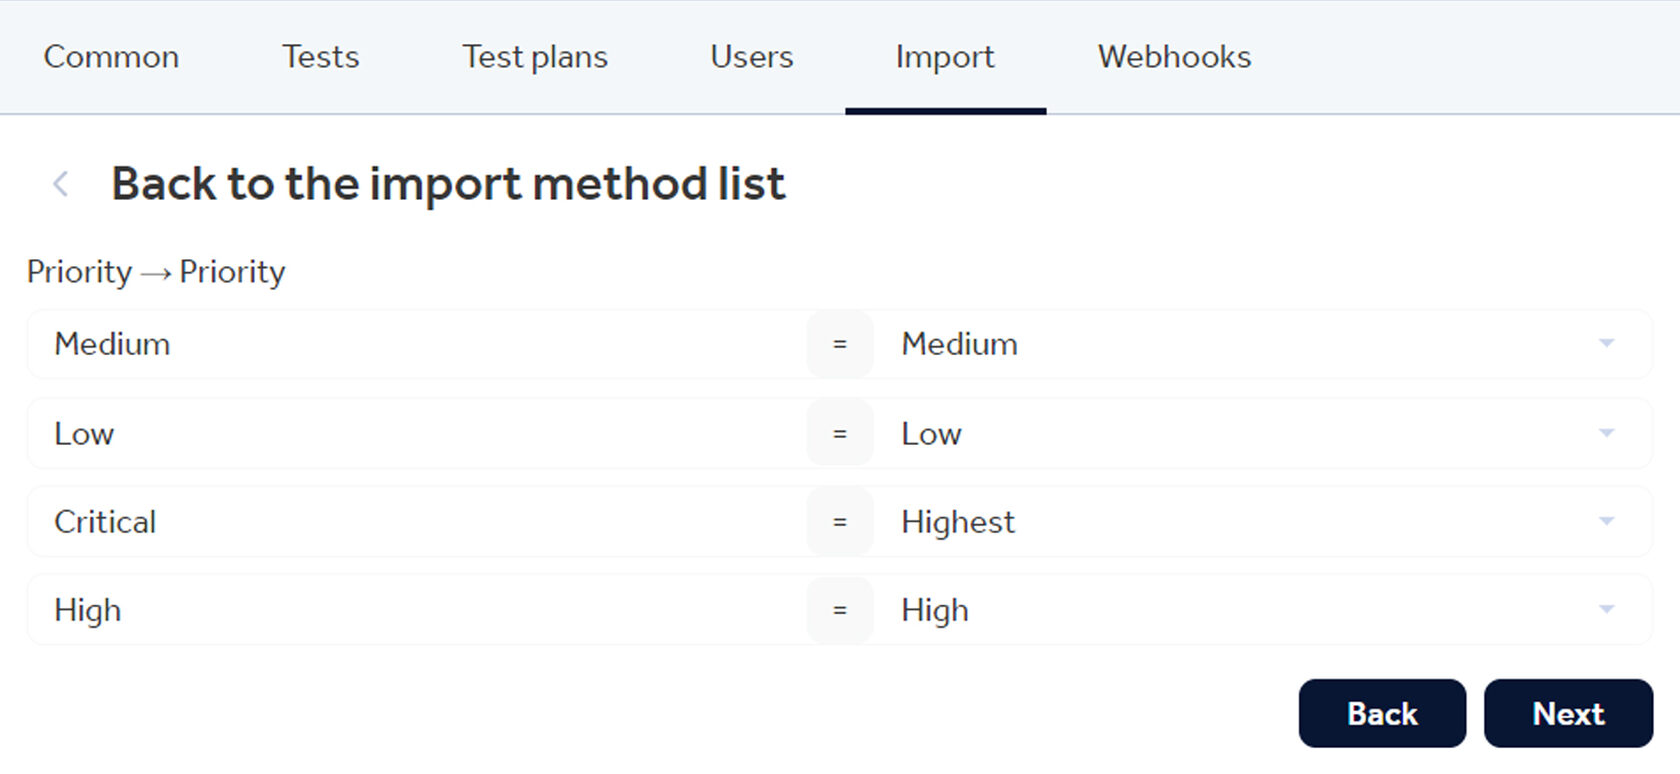
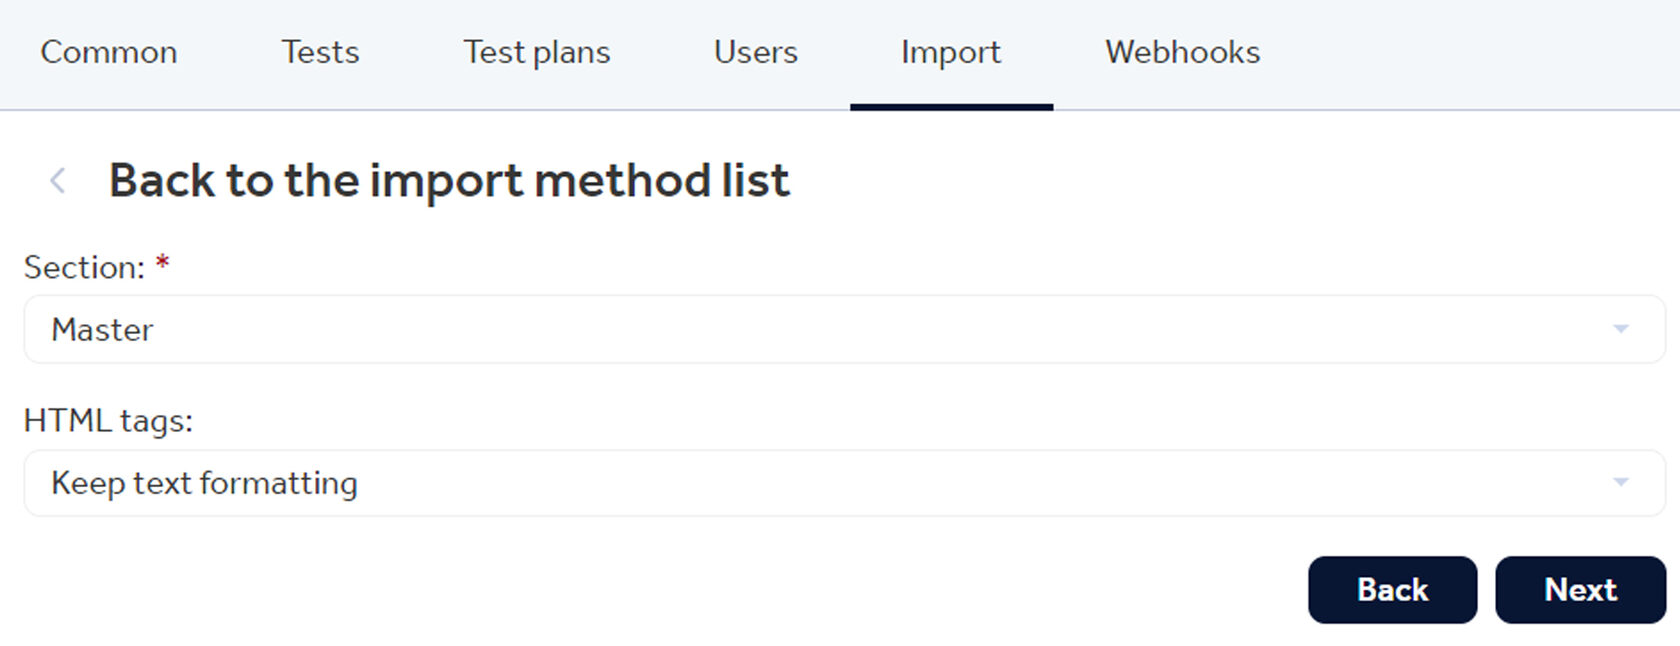
Select the section into which the tests need to be transferred and delete or save the HTML tags.
Once you click Next, the test cases are imported and the system prompts you to go to the section or import another file. You will also be able to save the import configuration settings by clicking on Save configuration file. The configuration file is uploaded in JSON format, which can be used for the next import. The configuration file simplifies the field correlation procedure.
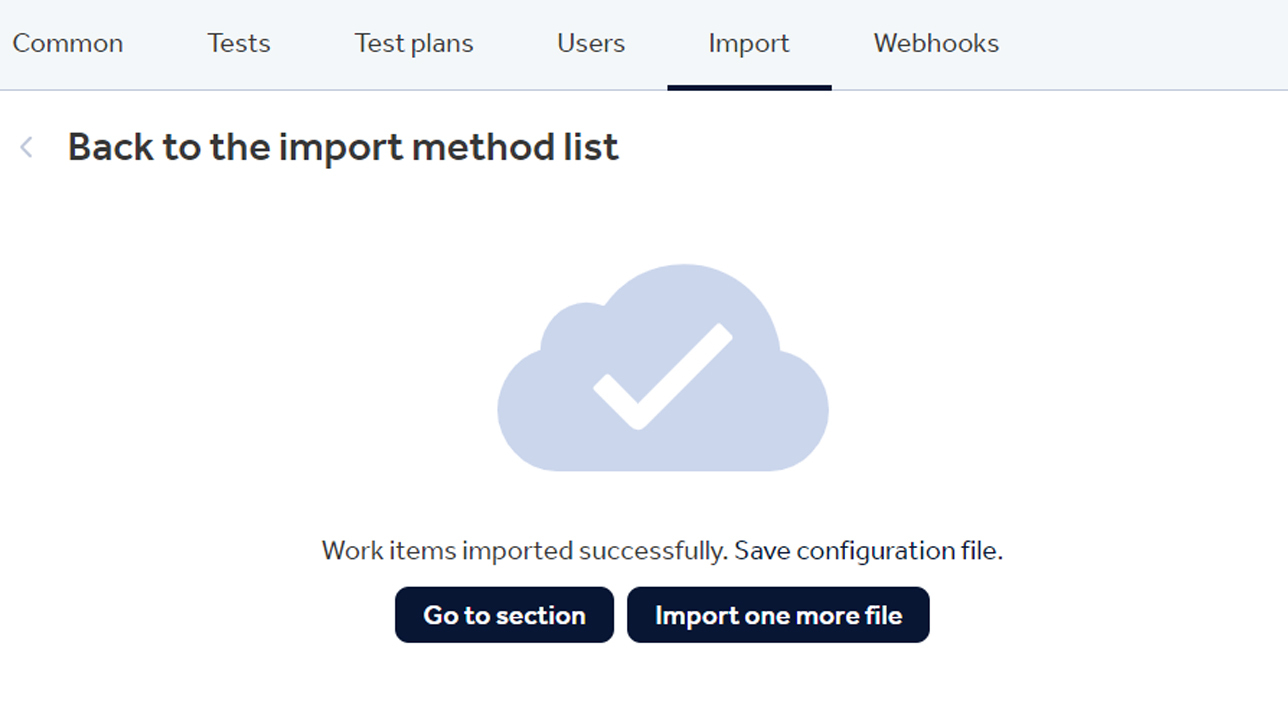
All done! If your cases include attachments, make sure that they are listed as links when transferring data in XLSX format.
Your data has been transferred. Happy testing!
